
Pipe or tube bending is a key and necessary task for many industries. Just open the hood of your car, and you will see several pipes made of aluminum, copper, and other materials bent to specification for your vehicle. Similarly, in homes, plants, factories, and almost anywhere, you see pipes bent at all angles to fulfill a need. However, bending pipe/ conduit can be frustrating, especially when getting the angles and measurements correct. These pipe bending jobs need a bender; for example, electricians use Electric Benders For Rigid Conduit. This is a special machine or tool in which you place a straight pipe, bend it to your requirements, and eliminate the need for costly conduit elbows when making your bends. All sizes and styles are available for various purposes.
There are small hand-held units for bending PVC pipes, hand units for bending conduits, and other small-diameter pipes. Then there are larger styles that still use your human strength and significant leverage. There are also hydraulic benders that can be operated using a foot pump or hooked up to a hydraulic system. Some use as much as 12 tons of pressure to form the pipe into the right shape. However, this article will specifically focus on electric conduit benders. To learn more about them, continue reading.
How to bend using an electric conduit bender?
When forming a conduit, you need- a level, pencil or sharpie, tri-stand, tape measure, pipe, conduit threader, conduit reamer, and a bender. The bending machine you choose must be of the correct size concerning the diameter of the tubes used, generally ¾ or ½ inch, though other sizes are also available. It is pretty simple when you use a bender with clear indicators and degree markers (like 30, 60, or 90 degrees). Using an electric bender with a degree scale and multiplier, making off-set, back-to-back, saddle bends, and stub-ups is easy and helps save a lot of time and energy.
When bending the conduit, you first need to mark the bending point on the pipe using a pencil. The line drawn on the tube signifies the back of the bend. You can use a measuring tape or directly place the conduit in the desired area and take precise measurements based on the physical attributes. Measure the space accurately where the tube is intended to go.
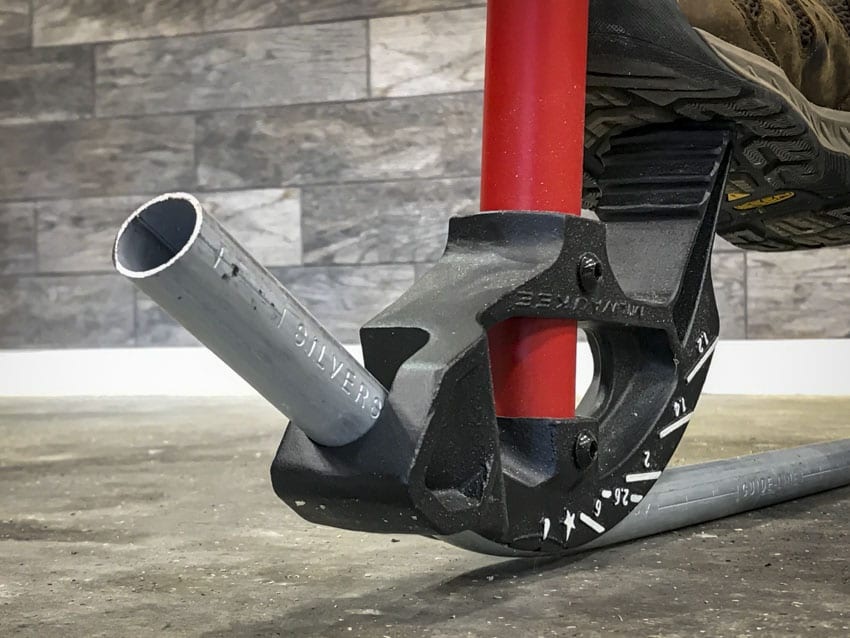
Next, ensure the pipe does not roll or slip in the bender. The arrow, tier drop and star symbols indicate the bend’s beginning and back. Depending on the bend type you need, match the top of the pipe with the accurate degree marker and cross-check if you have aligned the curve with the correct symbol. While bending, apply steady and firm pressure to the foothold to ensure the bend is made correctly. Remove the pipe from the tools and measure the degree of the corner by using the level. If the curve in your tube is at a different angle, place it back in the Electric Benders For Rigid Conduit and repeat the process. If your measurements are correct, the conduit will fit appropriately in the space it is to be installed; otherwise, you will have to adjust.
Learning to bend the conduit is a slow and steady process. It may need a lot of practice before bending the tube without fixing the degree. It would be better to measure it twice so that you will have only a few scrap pieces due to incorrect calculations. Also, make sure you buy a reliable electric conduit bender with the best warranty.